
TLDR;
The short version is follow the Fortinet Guide and Microsoft Guide to the letter.
The rest of this post steps through the guide and highlights some of the things that may go wrong, what the error messages are and why.
Step 1: Set up NPS/RADIUS
NPS is an extension to AD which allows it to act as a RADIUS server. RADIUS is commonly used for network authentication and access, across switches and routers and most ISP use it for access and accounting (well they did back in the day when I works for an ISP, but we obviously didn’t use AD and NPS – we used Freeradius)
Set up NPS and radius first without going MFA. Make sure the basics are working. More details in this MS Guide. Easy way is to use powershell
Install-WindowsFeature NPAS -IncludeManagementTools
Register NPS with AD
Add Radius Client. This shouldn’t be hard. Just set the Shared Secret
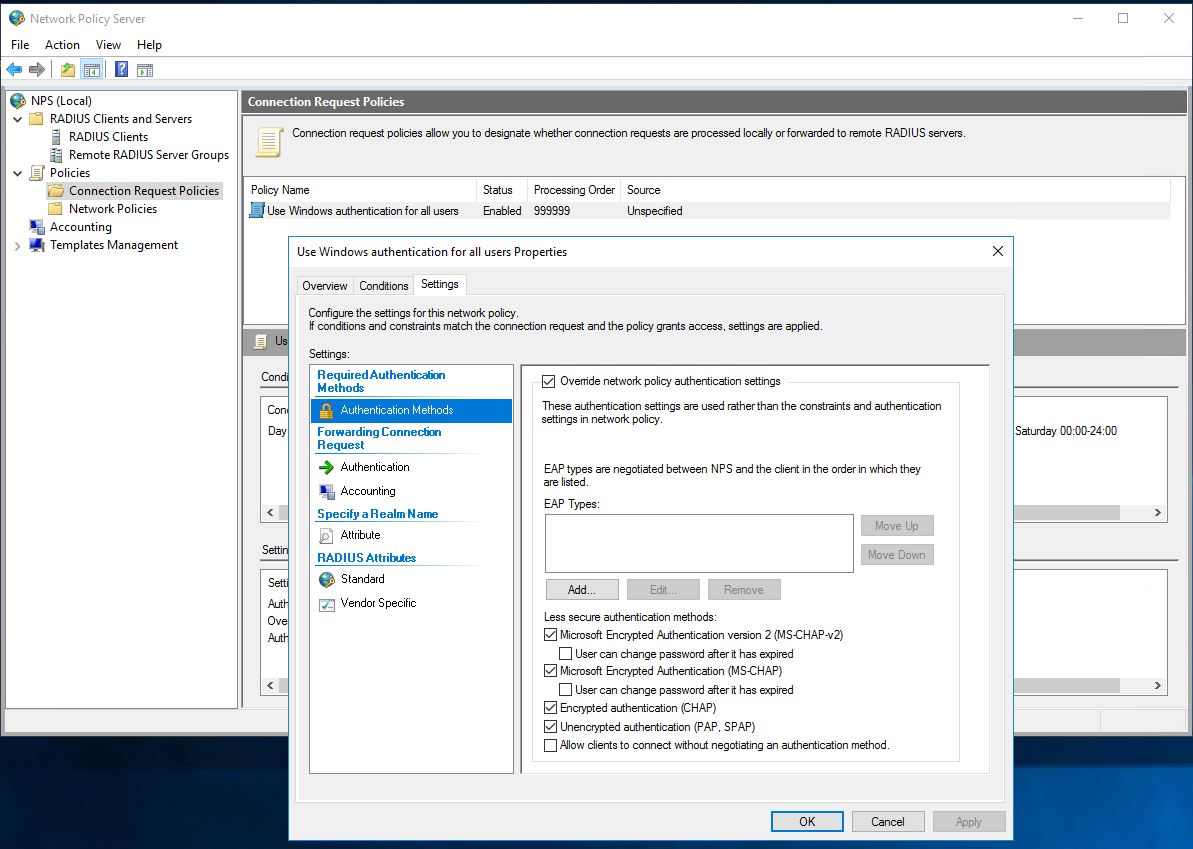
Change Connection Request Policy to allow PAP.
- Setup RADIUS Server in Fortigate.
- Test basic authentication.
Gotcha 1. But PAP is insecure!
By default NPS only accepts MSCHAPv2 for authentication requests. Now Fortigate can use MSCHAPv2 for basic RADIUS auth, but not all forms of MFA are supported. If you leave at MSCHAPv2 then a lot of below will work. Just when you get to testing MFA the mobile app notifications will work, but the mobile app verification codes will not.
Gotcha 2. Testing Auth from the UI
If you have enabled PAP then you might not notice this, but if you are testing using MSCHAPv2 then connection testing from the UI works, but user auth doesn’t. This is because the UI test always uses PAP, even if you configure the associated radius server to use MSCHAPv2. Go figure.
Answer is to check user auth from the CLI.
Step 2: Setting up NPS AzureMFA Extension
Follow the guide: https://docs.microsoft.com/en-us/azure/active-directory/authentication/howto-mfa-nps-extension-vpn#install-and-configure-the-nps-extension
- Set the registry key to False. The AzureMFA key won’t exist in registry like in the guide, until AFTER you install the extension.
- Get your Azure Active Directory GUID ID
- Download the NPS extension and install it
- Run the configuration script as Administrator
Gotcha 1. Need to enable TLS1.2
If config script fails at the first hurdle, in installing nuget and associated packages, then you will need to enable TLS1.2 in your powershell session. The error message is suitably vague about checking your internet connection.
[Net.ServicePointManager]::SecurityProtocol = [Net.SecurityProtocolType]::Tls12
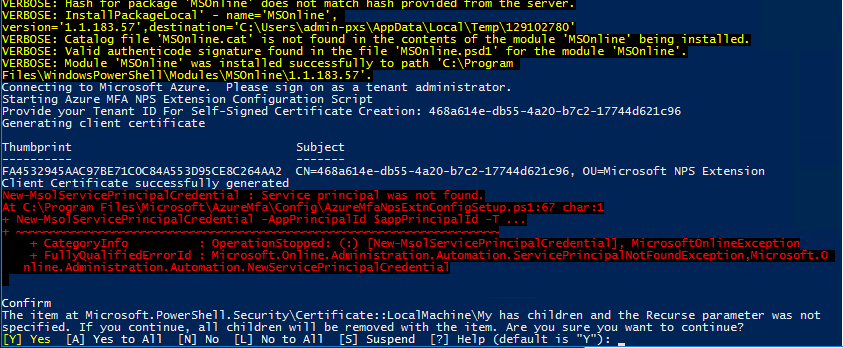
Gotcha 2. Service Principle not found
Awesome error message. What this means is that you don’t have an appropriate Azure AD Premium P2 license similar on your account and assigned to at least one user.
$appPrincipalId="981f26a1-7f43-403b-a875-f8b09b8cd720"
is hardcoded in the script and if not found then you get
New-MsolServicePrincipalCredential : Service principal was not found
when the script tries to assign generated cert to a non existant principle.
Thanks to this site: https://albandrodsmemory.wordpress.com/2019/05/06/configuring-azure-mfa-in-adfs-service-principal-was-not-found/
Gotcha 3. All RADIUS client auth is now MFA enabled.
from the guide: After you install and configure the NPS extension, all RADIUS-based client authentication that is processed by this server is required to use MFA. If that’s not what you want you can trust the registry key set above. Or better still plan your NPS deployment and make sure you only use this NPS server for MFA authenticated stuff.
What if I have O365 with MFA, but no Azure AD Premium?
Well, the NPS Extension will not install unless you have at least one user with AD premium license installed. But, once that is out the way, if you have users with O365 Business Premium or similar that allows you to enable MFA to access office then it will work against those. My user below does not have a P2 seat assigned to it, but MFA works.
FGT (VBL) # diagnose test authserver radius **** pap phil.snowdon@******nz ******
Enter Your Microsoft verification code
authenticate 'phil.snowdon@*****nz' against 'pap' succeeded, server=primary assigned_rad_session_id=1615065513 session_timeout=0 secs idle_timeout=0 secs!
Step 3: Step up SSL VPN with RADIUS Auth
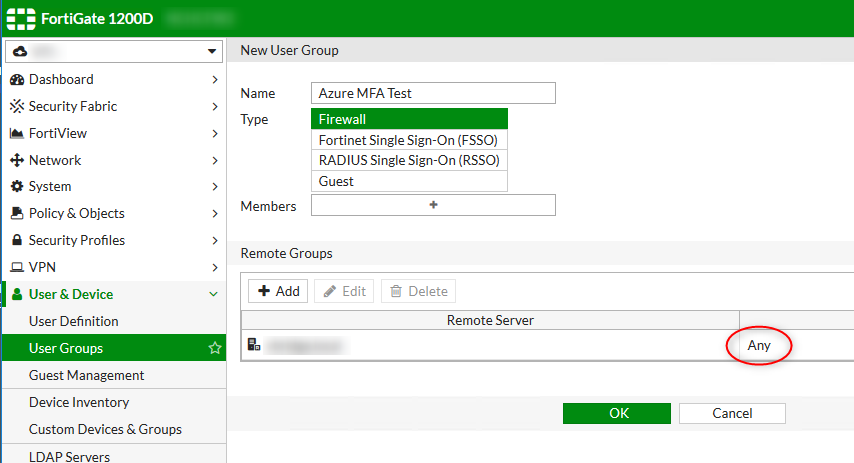
Under User Groups on the Fortigate, Create a Firewall group, with a Remote Group and select your RADIUS server created in Step 2, and set the Group to Any
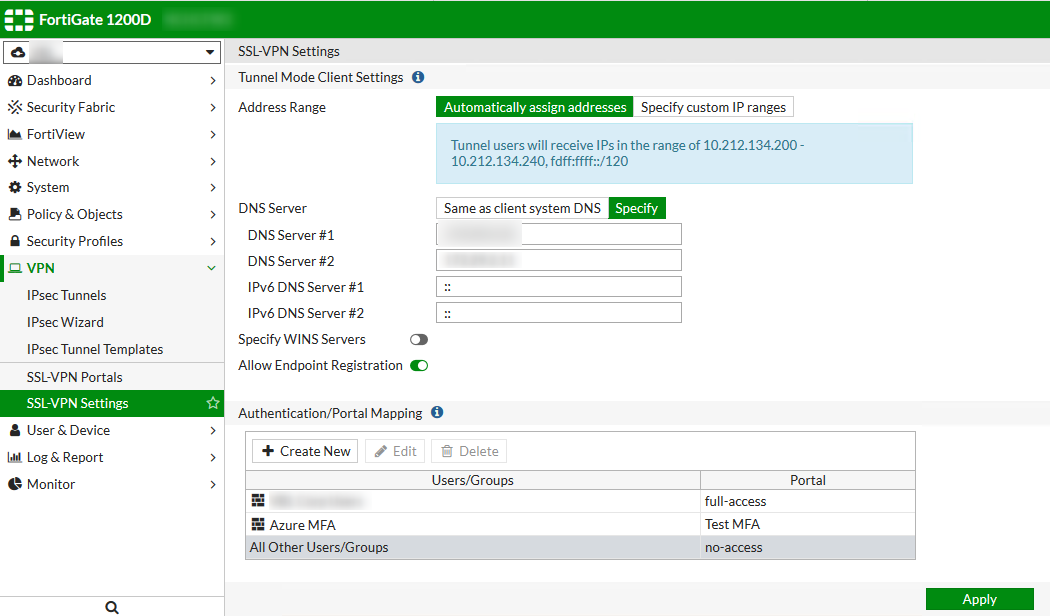
Then Set up a SSL portal as you would normally, tunnel mode or web. and under settings,
Gotcha 1: Set the Group
If you set the group to anything other than Any, things won’t work. This may seem a bit odd, as for example you might wish to limit VPN access to an AD group called ‘VPN Users’. It would make sense right? But this group would actually be a check against a Vendor specific AV pair that the radius server may return and not related to AD at all. See this link: https://kb.fortinet.com/kb/documentLink.do?externalID=FD40923
That doesn’t explain why…. If you look at the debug logs you’ll see something like
[2529] fnbamd_auth_handle_radius_result-->Result for radius svr 'TEST' 172.xx.xx.xx(1) is 0
[2459] fnbamd_radius_group_match-Skipping group matching
[984] find_matched_usr_grps-Skipped group matching
Result 0 means the authentication worked, but you then see that the group matching is skipped. This is because the NPS server did not return the AV Pair Fortinet-Group-Name which is what gets used for matching. More details here: https://kb.fortinet.com/kb/documentLink.do?externalID=FD36464
So basically you need to control the access some other way. Either by Individually allowing Dial-In access. (AD User Manager –> Find User -> Properties -> Dial-In) or by Creating an NPS Policy to allow access to your AD group
Useful links
- https://docs.fortinet.com/document/fortigate/6.2.0/azure-cookbook/517582/configuring-forticlient-vpn-with-multifactor-authentication
- https://docs.microsoft.com/en-us/azure/active-directory/authentication/howto-mfa-nps-extension-vpn#install-and-configure-the-nps-extension
- https://kb.fortinet.com/kb/documentLink.do?externalID=FD46949